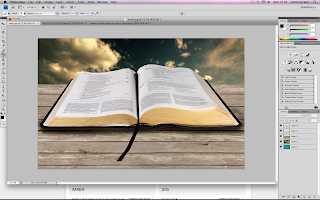
Using Photoshop CS4, I began to follow a tutorial to create a 3D book.
Using the magnetic lasso, I was able to remove the background originally around the book itself, and replace it with the cloudy background, scaling it to fit the image.
Using the quick selection tool, I was able to select just the pages section of the book and delete this.
I was then able to put the grassy imagine in this place, and warp it to make it look more realistic. After this, I created a new layer and used a large brush to add shadows; starting with it black, then lowering the opacity and blending to make them more realistic.
After selecting the section of road that I needed (using the magnetic lasso tool), I copied and pasted it into the book image. Using the warp and scale tools, I was able to add depth to the image and make the road look more realistic. I also added shadows using a large black brush, highlights and burns tool, in the right places to match the background.
After cropping trees, and editing the layer and removing any remaining white, I was able to add them to the book and make them look in place by flipping them, and adding various shadows.
Again, using the burns tool and highlighting and using the large brush, I have attempted to make the image look more realistic.
This photoshop tutorial has taught me the many options and effects available, hopefully allowing me to create more interesting and eye catching digipacks and posters.
Messing around on photoshop, I created a Hockney style imagine of Elli Goulding... If I were to improve this cover then I feel that it would contribute to an interesting digipack.
Messing around on photoshop, I created a Hockney style imagine of Elli Goulding... If I were to improve this cover then I feel that it would contribute to an interesting digipack.


No comments:
Post a Comment